
Progressive Delivery with Argo Rollouts: Canary Deployment

In Part 1 of Argo Rollouts, we have seen what Progressive Delivery is and how you can achieve the Blue-Green deployment type using Argo Rollouts. We also deployed a sample app in a Kubernetes cluster using it. Do read the first part of this Progressive Delivery blog series, if you haven’t yet.
In this hands-on article, we will explore what is the canary deployment strategy and how you can achieve the same using Argo Rollouts. But before that, let’s first understand what is canary deployment and the need behind it.
What is Canary Deployment?
As stated rightly by Danilo Sato in this CanaryRelease article,
“Canary release is a technique to reduce the risk of introducing a new software version in production by slowly rolling out the change to a small subset of users before rolling it out to the entire infrastructure and making it available to everybody.”
Canary is one of the most popular and widely adopted techniques of progressive delivery. Do you know why we call it canary and not anything else? The term “canary deployment” comes from an old coal mining technique. These mines often contained carbon monoxide and other dangerous gases that could kill the miners. Canary birds were more sensitive to airborne toxins than humans, so miners would use them as early detectors, So Similar approach is used in canary deployment, where instead of putting entire end-users in danger like in old big-bang deployment, we instead start releasing our new version of the application to a very small percentage of users and then try to do analysis and see if all working as expected and then gradually release it to a larger audience in an incremental way.
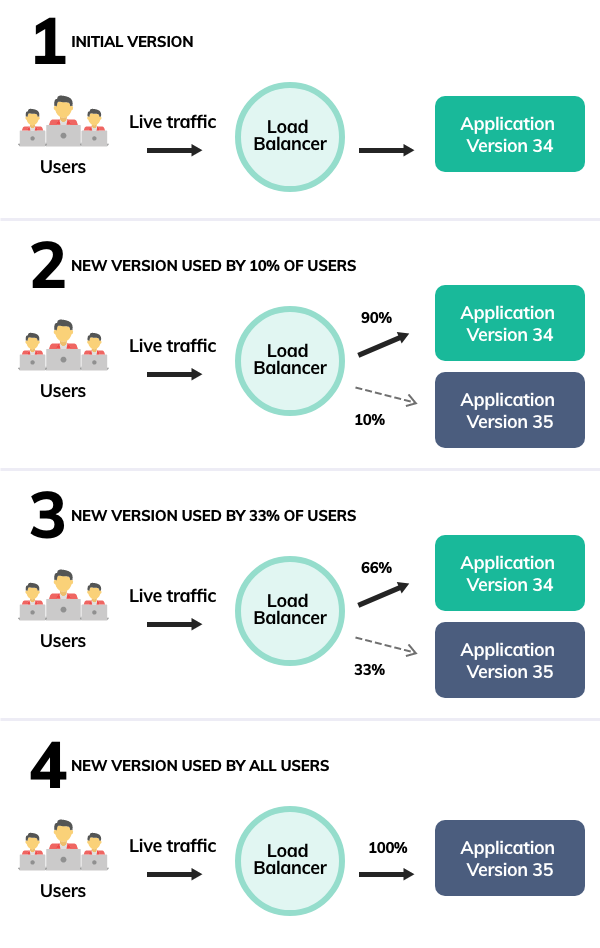
Need for Canary Deployment
Some of us have already seen that sometimes new updates of apps (like WhatsApp or Facebook) is visible to one of our friends but not to everyone, and that’s the power of canary deployment strategy handling new version rollout in the background. The problems that canary deployment tries to solve are:
- Canary deployments help to do testing in production with real users and real traffic which unfortunately Blue-Green deployment can not help with
- One gets the ability to analyze the response of a new version of your application in more controlled manner and then rollout efficiently to all the end-users incrementally.
- Infrastructure cost involved compared to the Blue-Green deployment technique is less.
- Lowest risk-prone compared to all other deployment strategies.
How does Argo Rollouts handle the Canary Deployment?
Let’s say, once you start using the Argo Rollouts controller for canary style deployment, it basically creates a new ReplicaSet of the new version of the application (which creates a new set of pod) and divides the traffic between the old stable and this new canary version by using the single service object that it was using to route traffic to the older stable version.
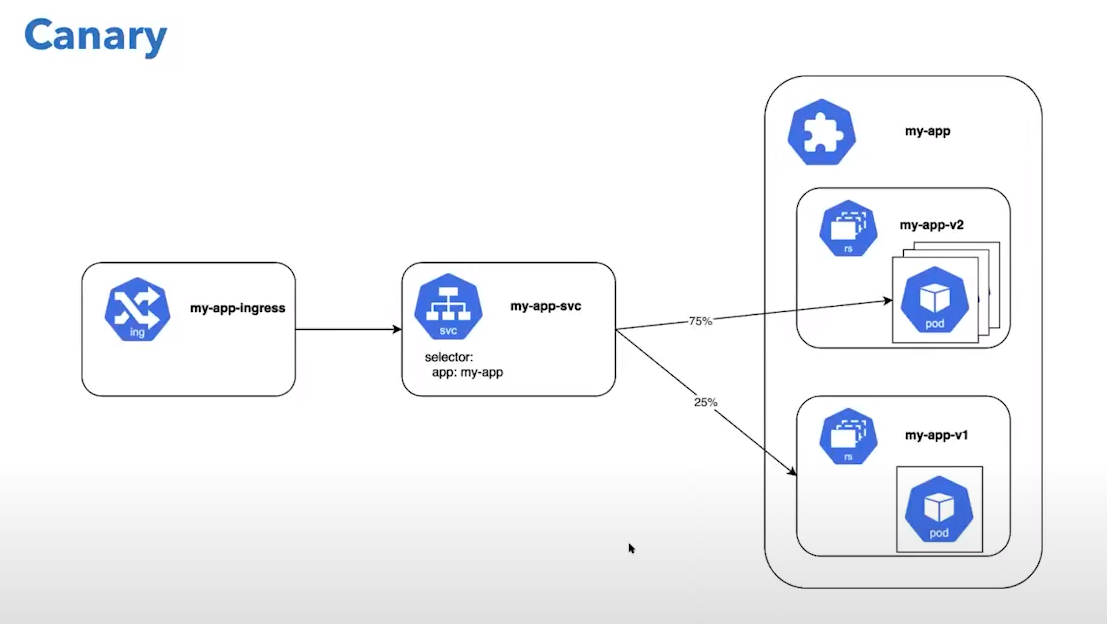
Now, let’s try on our own with some hands-on to see how it works in real.
Lab/Hands-on of Argo Rollouts with Canary Deployment
If you do not have K8s cluster readily available to do further lab then we recommend going for CloudYuga platform-based version of this blogpost. Else, you can set up your own kind local cluster with Nginx controller also deployed, and follow along to execute the below commands against your kind cluster.
Clone the Argo Rollouts example GitHub repo or preferably, please fork this
git clone https://github.com/NiniiGit/argo-rollouts-example.git
Installation of Argo Rollouts controller
Create the namespace for installation of the Argo Rollouts controller and Install the Argo Rollouts through the below command, more about the installation can be found in the first part of the progressive delivery blog series.
kubectl create namespace argo-rollouts
kubectl apply -n argo-rollouts -f https://github.com/argoproj/argo-rollouts/releases/latest/download/install.yaml
You will see that the controller and other components have been deployed. Wait for the pods to be in the Running state.
kubectl get all -n argo-rollouts
Install Argo Rollouts Kubectl plugin with curl for easy interaction with Rollout controller and resources.
curl -LO https://github.com/argoproj/argo-rollouts/releases/latest/download/kubectl-argo-rollouts-linux-amd64
chmod +x ./kubectl-argo-rollouts-linux-amd64
sudo mv ./kubectl-argo-rollouts-linux-amd64 /usr/local/bin/kubectl-argo-rollouts
kubectl argo rollouts version
Argo Rollouts comes with its own GUI as well that you can access with the below command.
kubectl argo rollouts dashboard
Now you can access Argo Rollouts console, by accessing http://localhost:3100 on your browser. You would be presented with UI as shown below (currently it won’t show you anything since we are yet to deploy any Argo Rollouts based).
 Figure 1: Argo Rollouts Dashboard
Now, let’s go ahead and deploy the sample app using the canary deployment strategy.
Canary Deployment with Argo Rollouts
To experience how the canary deployment works with Argo Rollouts, we will deploy the sample app which contains Rollouts with canary strategy, Service, and Ingress as Kubernetes objects.
rollout.yaml content:
apiVersion: argoproj.io/v1alpha1
kind: Rollout
metadata:
  name: rollouts-demo
spec:
  replicas: 5
  strategy:
    canary:
      steps:
      - setWeight: 20
      - pause: {}
      - setWeight: 40
      - pause: {duration: 10}
      - setWeight: 60
      - pause: {duration: 10}
      - setWeight: 80
      - pause: {duration: 10}
  revisionHistoryLimit: 2
  selector:
    matchLabels:
      app: rollouts-demo
  template:
    metadata:
      labels:
        app: rollouts-demo
    spec:
      containers:
      - name: rollouts-demo
        image: argoproj/rollouts-demo:blue
        ports:
        - name: http
          containerPort: 8080
          protocol: TCP
        resources:
          requests:
            memory: 32Mi
            cpu: 5m
Here setWeight field dictates the percentage of traffic that should be sent to the canary, and the pause struct instructs the rollout to pause. When the controller reaches a pause step for a rollout, it will set adds a PauseCondition struct to the .status.PauseConditions field. If the duration field within the pause struct is set, the rollout will not progress to the next step until it has waited for the value of the duration field. Otherwise, the rollout will wait indefinitely until that pause condition is removed. By using the setWeight and the pause fields, a user can declarative describe how they want to progress to the new version. You can find more details about all the different parameters available.
Now, we will create the service object for this rollout object.
service.yaml content:
apiVersion: v1
kind: Service
metadata:
  name: rollouts-demo
spec:
  ports:
  - port: 80
    targetPort: http
    protocol: TCP
    name: http
  selector:
    app: rollouts-demo
Let’s now create an ingress object.
ingress.yaml content:
apiVersion: networking.k8s.io/v1
kind: Ingress
metadata:
  name: rollouts-ingress
  annotations:
    kubernetes.io/ingress.class: nginx
spec:
  rules:
  - http:
      paths:
      - path: /
        pathType: Prefix
        backend:
          service:
            name: rollouts-demo
            port:
              number: 80
To keep things simple, let’s create all these objects for now in the default namespace by executing the below commands.
kubectl apply -f argo-rollouts-example/canary-deployment-example/
You would be able to see all the objects created in the default namespace by running the below command.
kubectl get all
Now, you can access your sample app, by accessing this http://localhost:80 on your browser. You would be able to see the app as shown below.
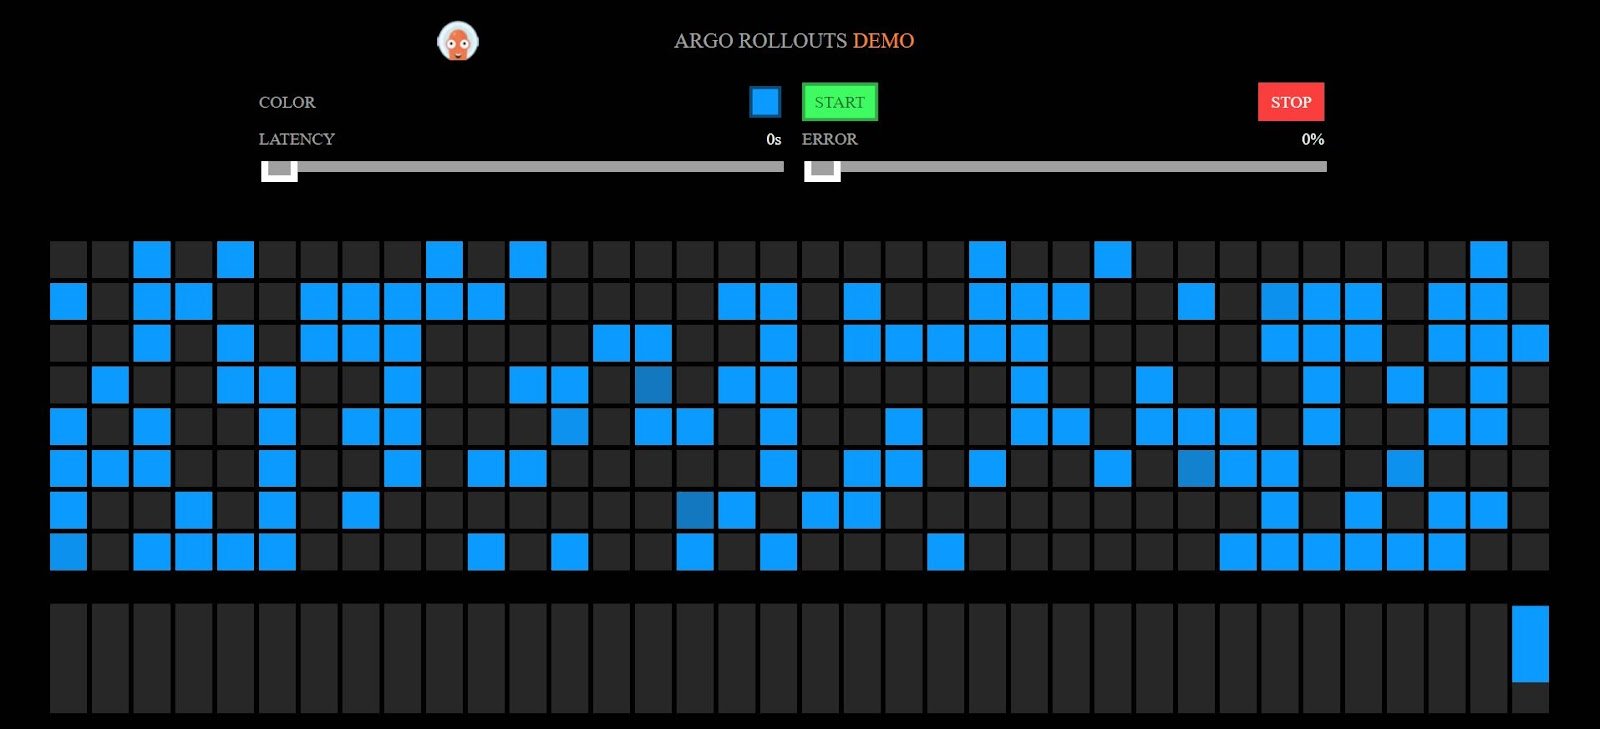 Figure 2: Sample app with blue-version
If you visit the Argo Rollouts console by again accessing http://localhost:3100 on your browser then this time, you could see the sample deployed on the Argo Rollouts console as below.
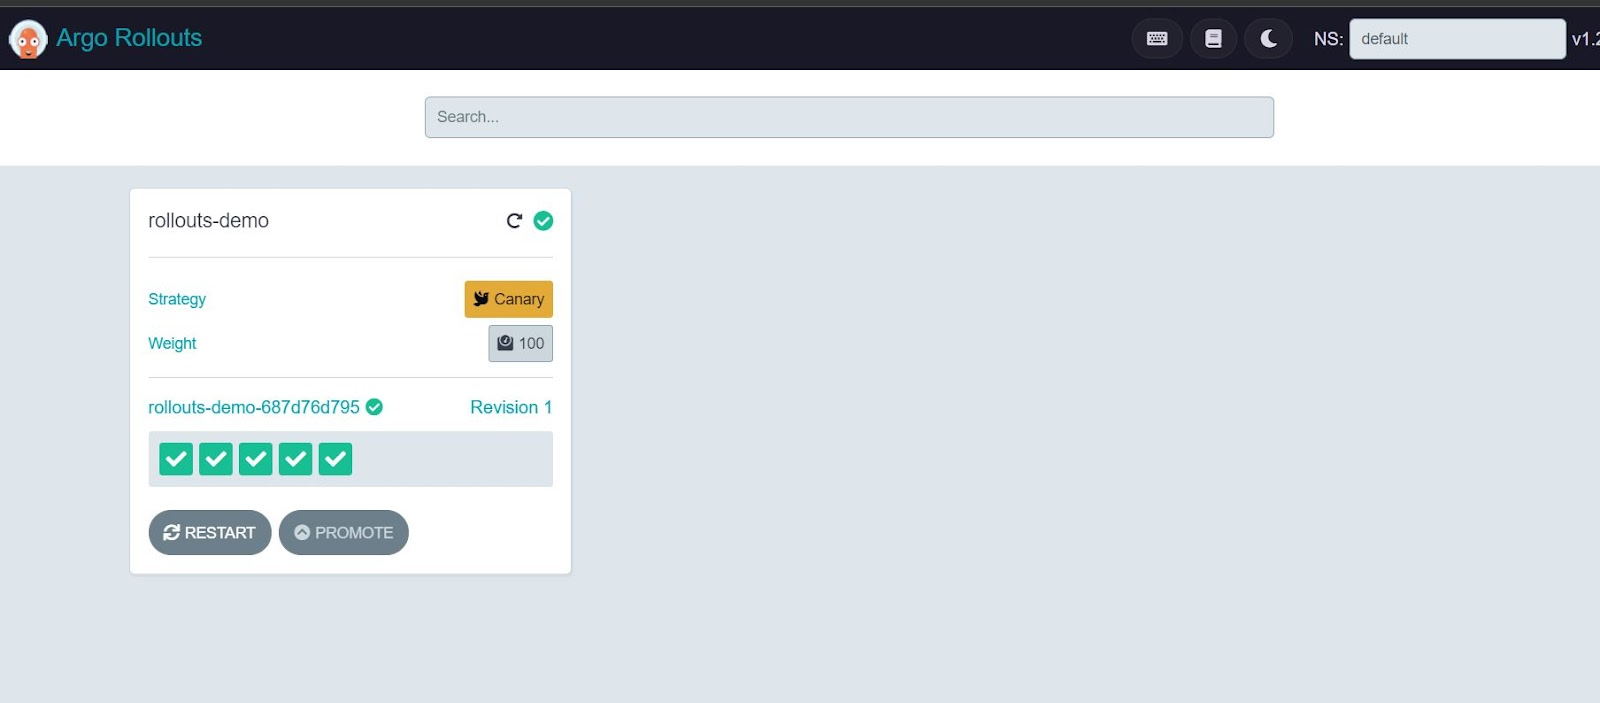 Figure 3: Canary Deployment on Argo Rollouts Dashboard
Click on this rollout-demo in the console and it will present you with its current status of it as below.
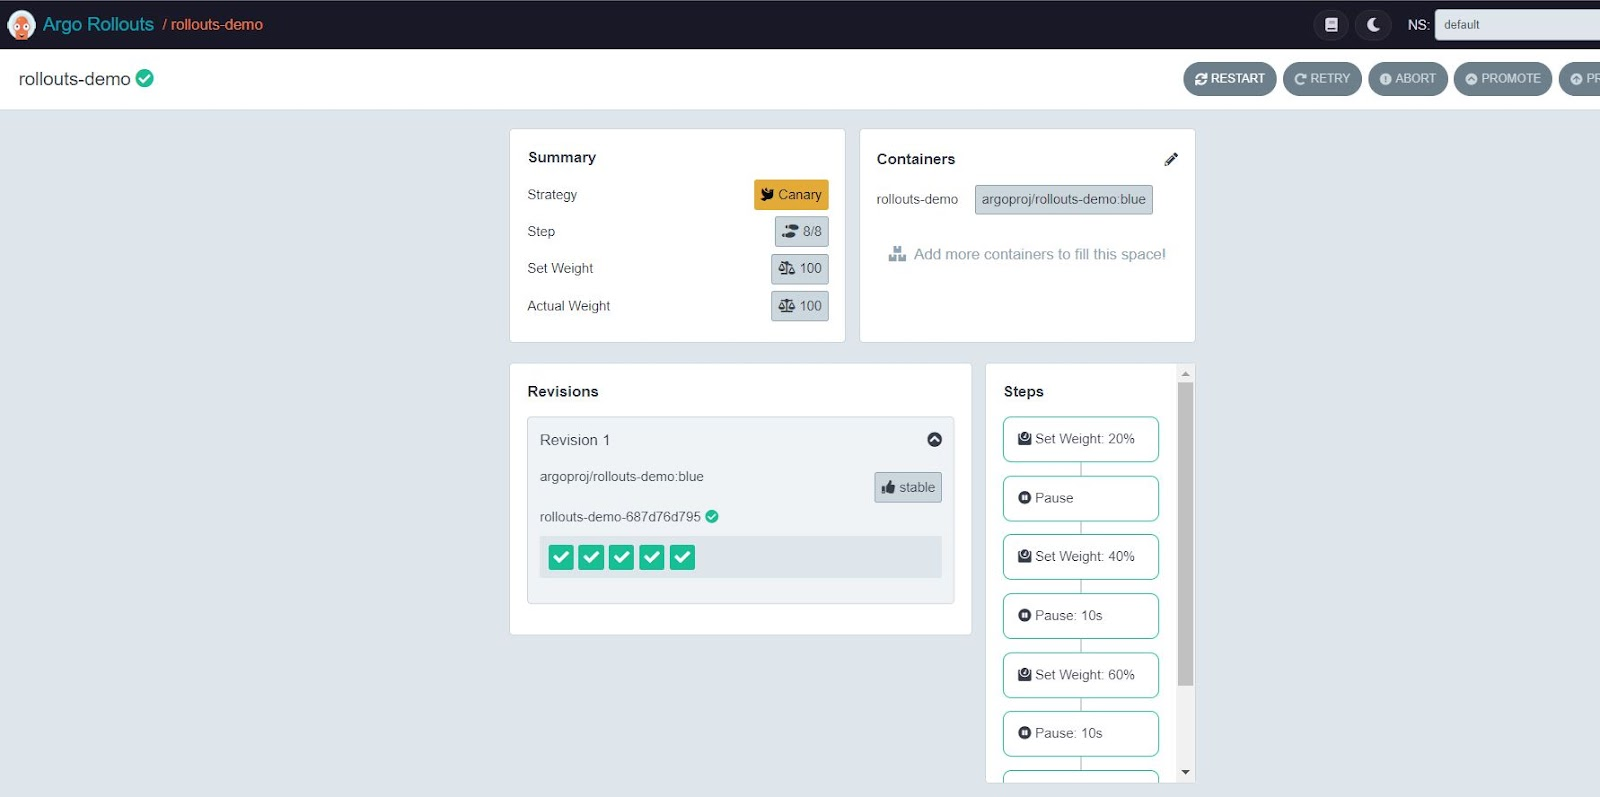 Figure 4: Details of Canary Deployment on Argo Rollouts Dashboard
Again, either you can use this GUI or else use the command shown below to continue with this demo. You can see the current status of this rollout by running the below command as well.
kubectl argo rollouts get rollout rollouts-demo
Now, let’s deploy the Yellow version of the app using canary strategy via command line.
kubectl argo rollouts set image rollouts-demo rollouts-demo=argoproj/rollouts-demo:yellow
You would be able to see a new, i.e yellow version-based pod of our sample app, coming up.
kubectl get pods
Currently, only 20% i.e 1 out of 5 pods with a yellow version will come online, and then it will be paused as we have mentioned in the steps above. See line number 9 in the rollout.yaml On the Argo console, you would be able to see the new revision of the app with the changed image version running.
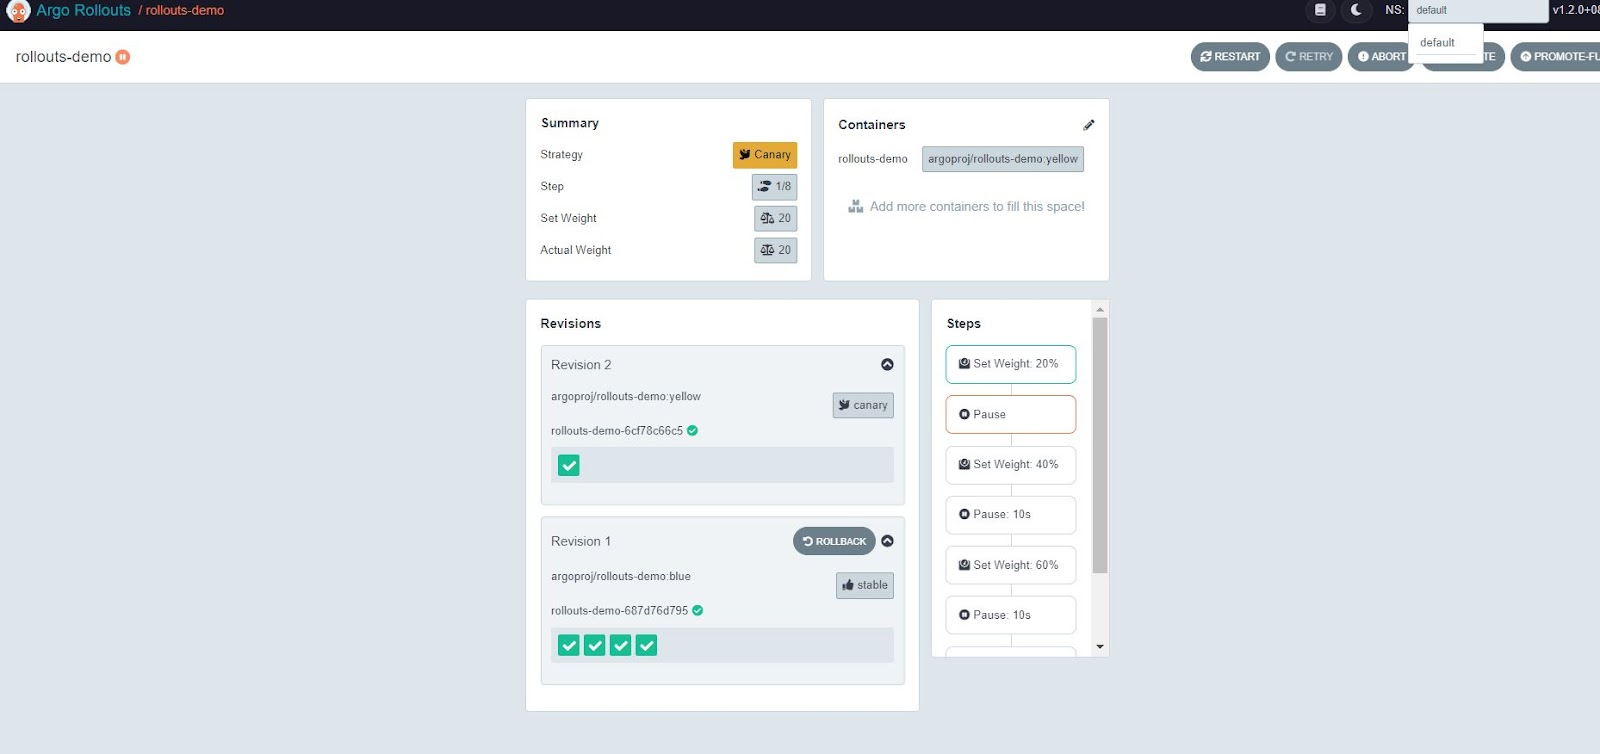 Figure 5: Another version of the sample app in Canary Deployment on Argo Rollouts Dashboard
If you visit the http://localhost:80 on your browser, you would still see only the majority of blue versions, and a very less number of yellow is visible as we have not yet fully promoted the yellow version of our app.
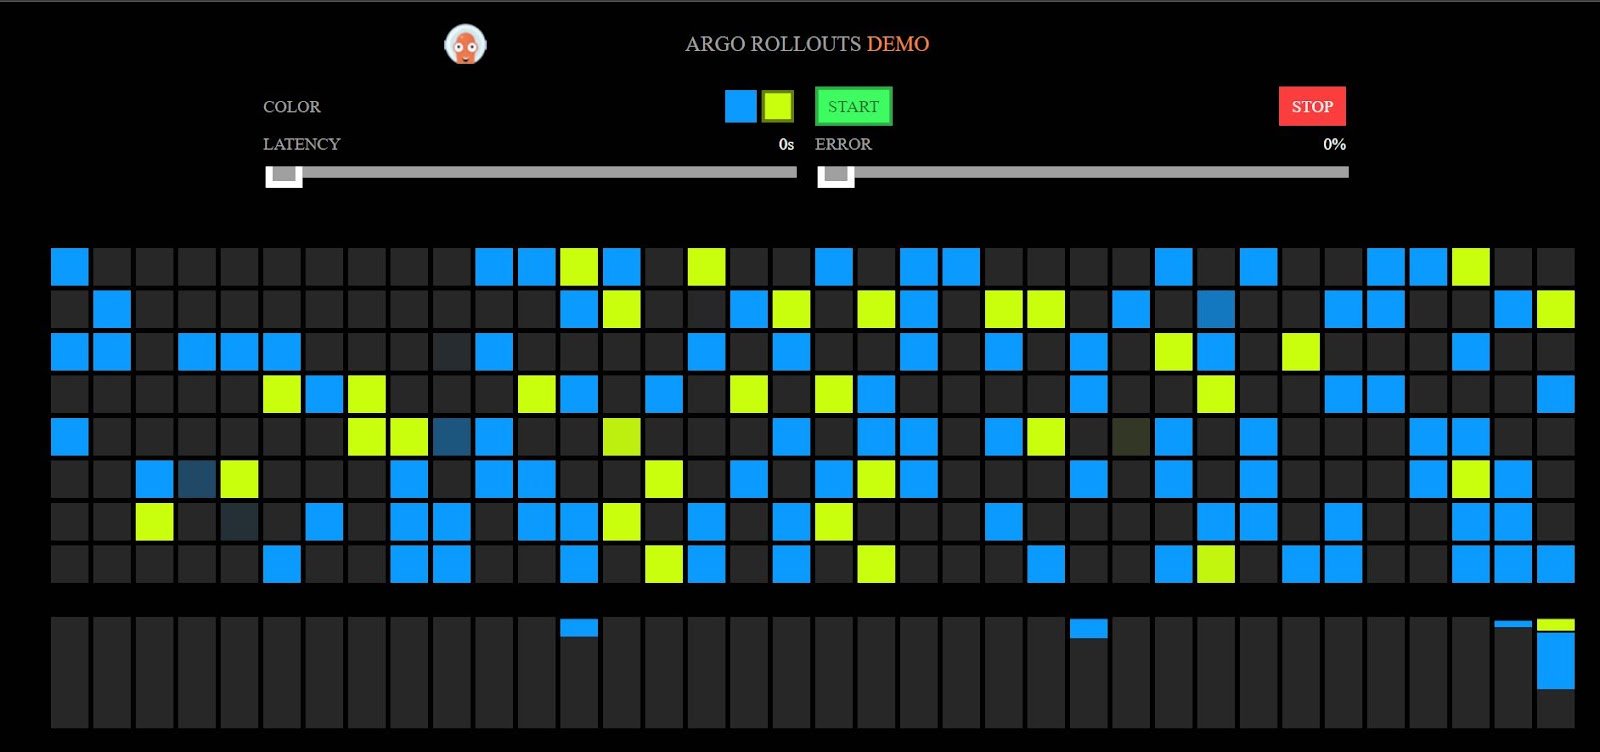 Figure 6: blue-yellow versions of the sample app
You can confirm the same now, by running the command below, which shows, the new version is in paused state.
kubectl argo rollouts get rollout rollouts-demo
Let’s promote the yellow version of our app, by executing the below command.
kubectl argo rollouts promote rollouts-demo
Run the following command and you would see it’s scaling the new, i.e yellow version of our app completely.
kubectl argo rollouts get rollout rollouts-demo
The same can be confirmed by running the below command, which shows the old set of pods i.e old blue version of our app, terminating or already terminated.
kubectl get pods
Eventually, if you visit the app URL on http://localhost:80 on your browser, you would see only the Yellow version is visible right now because we have fully promoted the yellow version of our app.
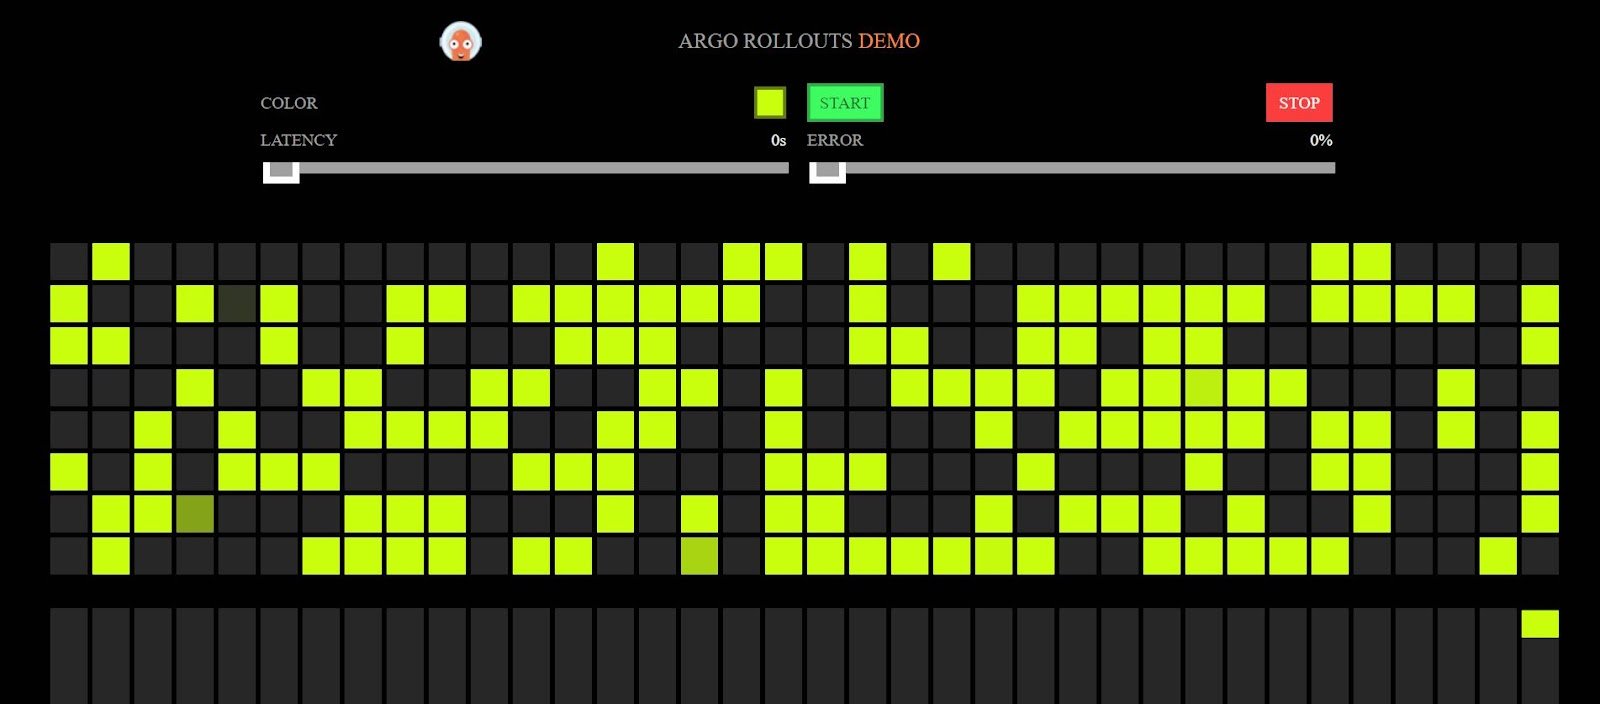 Figure 7: Sample app with yellow-version
Kudos!! you have successfully completed the canary deployment using Argo Rollouts. You can also delete this entire setup i.e our sample deployed app using the below command.
kubectl delete -f argo-rollouts-example/canary-deployment-example/
Summary
In this post, we experienced how we can achieve canary deployment style of progressive delivery using Argo Rollouts quite easily. Achieving canary deployment in this way with Argo Rollouts is simple and does not require any service mesh and provides much better control on rolling out a new version of your application than using the default rolling update strategy of Kubernetes.
I hope you found this post informative and engaging. I’d love to hear your thoughts on this post, so start a conversation on Twitter or LinkedIn :)
What Next? Now we have developed some more understanding of progressive delivery and created a canary deployment out of it. Next would be diving deeper to try the canary deployment with Analysis using Argo Rollouts, stay tuned for this post.
You can find all the parts of this Argo Rollouts Series below:
- Part 1: Progressive Delivery with Argo Rollouts: Blue Green Deployment
- Part 2: Progressive Delivery with Argo Rollouts: Canary Deployment
- Part 3: Progressive Delivery with Argo Rollouts: Canary with Analysis
- Part 4: Progressive Delivery with Argo Rollouts: Traffic Management
References and further reading:
Argo Rollouts
Kubernets Banglore workshop on Argo Rollouts
Argo Rollouts - Kubernetes Progressive Delivery Controller
CICD with Argo InfraCloud’s Progressive Delivery Consulting services
Looking for Progressive Delivery consulting and support? Explore how we’re helping companies adopt progressive delivery - from creating a roadmap to successful implementation, & enterprise support.
Stay updated with latest in AI and Cloud Native tech
We hate 😖 spam as much as you do! You're in a safe company.
Only delivering solid AI & cloud native content.


